Scrap your Summer
Join me on the Creative Scrapbooker Magazine Blog for a Scrapbook Layout...? Oh yeah... I went all scrappy for this post. I am sharing my NEW about to release TINBIT TRAVELS Collection with Wild Whisper! Swing by the Creative Scrapbooker Magazine Blog for a full tutorial! PIN IT EAT. SLEEP. CRAFT. {repeat}


Wow love it.. well done.. take care
ReplyDeleteThis is SOOOOO FREAKING AWESOME!!! OMG the embossed foil wrap is blowing my mind!!! You NAILED this one Nicole!!!
ReplyDeleteOh, this is BEAUFUL! I want one!
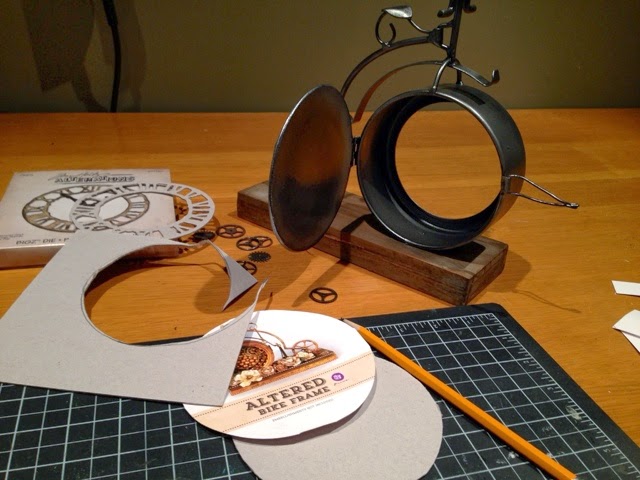
ReplyDeleteI have never seen this frame, it is so cool.
ReplyDeleteBut even cooler with your touch.
I love the front tire!!!
Also when in doubt add gears ;)
WOw, this is amazing!! Love that bike frame and your use of dies here is fabulous. How great that the clock fit so well, and I love all those gears. Thank you so much for sharing with us at Simon Says Stamp Monday Challenge Blog!
ReplyDeleteWow, this is absolutely amazing, Nicole! There are so many fabulous elements included that I'm still gazing in awe. Thanks for sharing the tutorial as well!
ReplyDeleteAbsolutely grungy awesome!!! Love all the little details!!!
ReplyDeleteBadass, indeed! Love it!
ReplyDeleteWow!!! Totally awesome alteration Nicole...so inspiring...love this !!!!
ReplyDeleteTHank You so much for sharing the tutorial
CRafty Hugs Annie x
What a fabulous alteration on this precious bike! Love the embossed metal on the outside and the green! Fabulous!
ReplyDeleteWhat a "fantastical" project! I love how steampunk it is! Wonderful job! Never would have guessed you used embossed foil paper!
ReplyDeleteNicole your creativity is totally amazing! LOve this piece!!!!! One word: STUNNING!!!!!!!!!!!!!!!!! THanks so much for joining us on Simon Says Stamp Monday Challenge! BArbarayaya
ReplyDeleteI dont even know how I wound up here on your blog but WOW. What an incredible vision and creation!! This is absolutely fantabulous! I like it so much I am going to pin it on my THings I Love Board on Pinterest - I think it deserves all the praise and admiration from the Pin world too.
ReplyDeleteThis is totally awesome. I love the steampunk theme, goes perfectly with the bike wheel. I am inspired now to make one of these for myself. TFS
ReplyDeleteWow! This is just soooo brilliant! Can't stop looking at it! Loads of brilliant colours and layers! A stunning make! Thanks for sharing the how to as well!
ReplyDeleteHugs,
Claudia x
OMG! I saw the bicycle at my LSS a and thought I would like to play with it. Yours is so amazing! Love steampunk and you nailed it! I am inspired! Thanks for sharing your amazing talent.
ReplyDelete